First steps with Sardana
Welcome! In this first lesson you will learn what Sardana is, meet the small set of concepts you need to get going, and install everything required for the rest of the tutorials.
What is Sardana
Sardana is a software suite for Supervision, Control and Data Acquisition in scientific installations – from a single laboratory instrument to a whole synchrotron beamline. It was initially developed at the ALBA synchrotron and is today maintained by a community of laboratories and individuals.
In practice, Sardana gives you:
a server that talks to your hardware (motors, counters, detectors, …) through small Python plugins called controllers,
a central place to run procedures (called macros): scans, movements, or any Python code you write yourself,
a command line interface called Spock that understands SPEC-like commands (
mv,ct,ascan, …),graphical user interfaces built with the Taurus library.
Sardana is built on top of the Tango distributed control system: the Sardana server is a Tango device server, and clients find it through the Tango database. You do not need to know Tango to follow these tutorials, but a running Tango database is a prerequisite (more on that below).
The building blocks
Five names come up constantly when working with Sardana. Here is all you need to know about them for now:
- Pool
The part of the server that manages the hardware. It hosts controllers (plugins that translate between Sardana and a specific piece of hardware) and elements (the individual motors, counters, and other channels those controllers expose).
- MacroServer
The part of the server that executes macros: Python procedures such as scans. It connects to one or more Pools to operate on their elements.
- Macro
A procedure that the MacroServer can run. Sardana ships with a large catalog of standard macros (motion, acquisition, scans, …) and you can easily add your own – you will write one in the third tutorial.
- Door
The entry point through which a client runs macros and receives their results and output. A MacroServer can have several doors, so several clients can work at the same time.
- Spock
The IPython-based command line client. It connects to a door and lets you run macros as if they were shell commands.
A simplified architecture
Putting it all together, a minimal Sardana system looks like this: a single
server process (called simply Sardana) runs a Pool and a MacroServer. The
Pool talks to the hardware through controller plugins. You, the user, sit in
front of Spock (or a GUI), which is connected to a door of the MacroServer.
When you type ascan, the macro runs in the server, moving motors and
reading counters through the Pool, and streams its output back to your
screen. The Tango database glues it all together by letting every part find
the others by name.
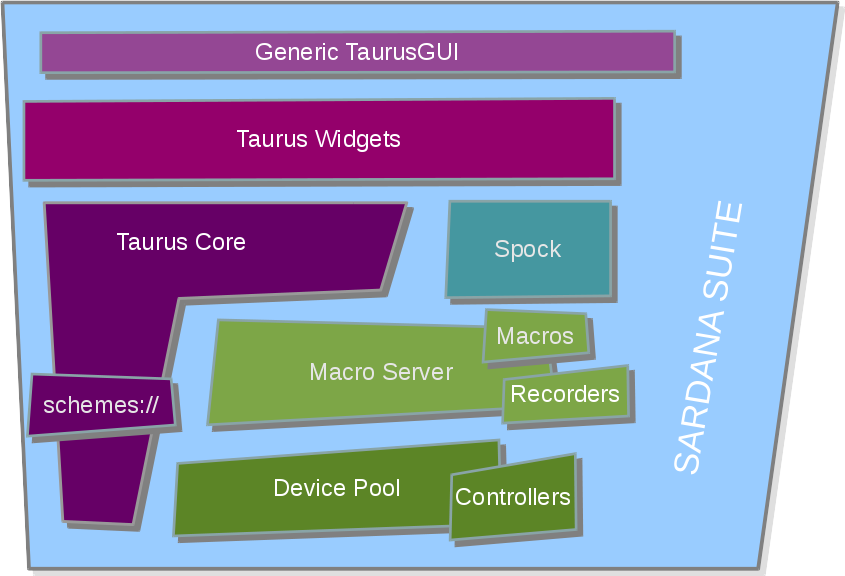
The sketch above shows the different subsystems. You will normally not be concerned with these implementation details, but it helps to appreciate the modularity of the system. A complete description is given in the overview.
Installing Sardana for the tutorials
For this tutorial series you only need Sardana itself plus the dependencies of Spock. The quickest, platform-independent way is pip:
pip3 install "sardana[spock]"
If you also want the Qt graphical tools (not needed to follow the tutorials), install all the optional dependencies instead:
pip3 install "sardana[all]"
Verify the installation by printing the version:
python3 -c "import sardana; print(sardana.__version__)"
Other installation methods (conda, Debian packages, installing from the git sources, docker) are covered in the installation guide.
The Tango database
As mentioned above, Sardana runs on top of Tango, so a running Tango
database server must be reachable from your machine. The TANGO_HOST
environment variable tells Sardana where to find it, e.g.:
export TANGO_HOST=localhost:10000
If your institute already runs a Tango database, just point TANGO_HOST at
it. If not, see the installation guide for how to
run a lightweight Tango database locally for testing.
Next steps
You now know the vocabulary and have Sardana installed. Continue with Set up a simulated beamline to start a server and populate it with a fully simulated beamline. For the bigger picture of the Sardana architecture and its full feature set, see the overview, and keep the glossary at hand for any unfamiliar term.